B. Reagents:
1 gallon whole milk
1 1/2 tsp citric acid
1/4 tsp liquid rennet
C. Procedure:
1. Dissolve the citric acid in 1/4 cup water; set aside.
2. Mix the rennet with 1/4 cup water; set aside.
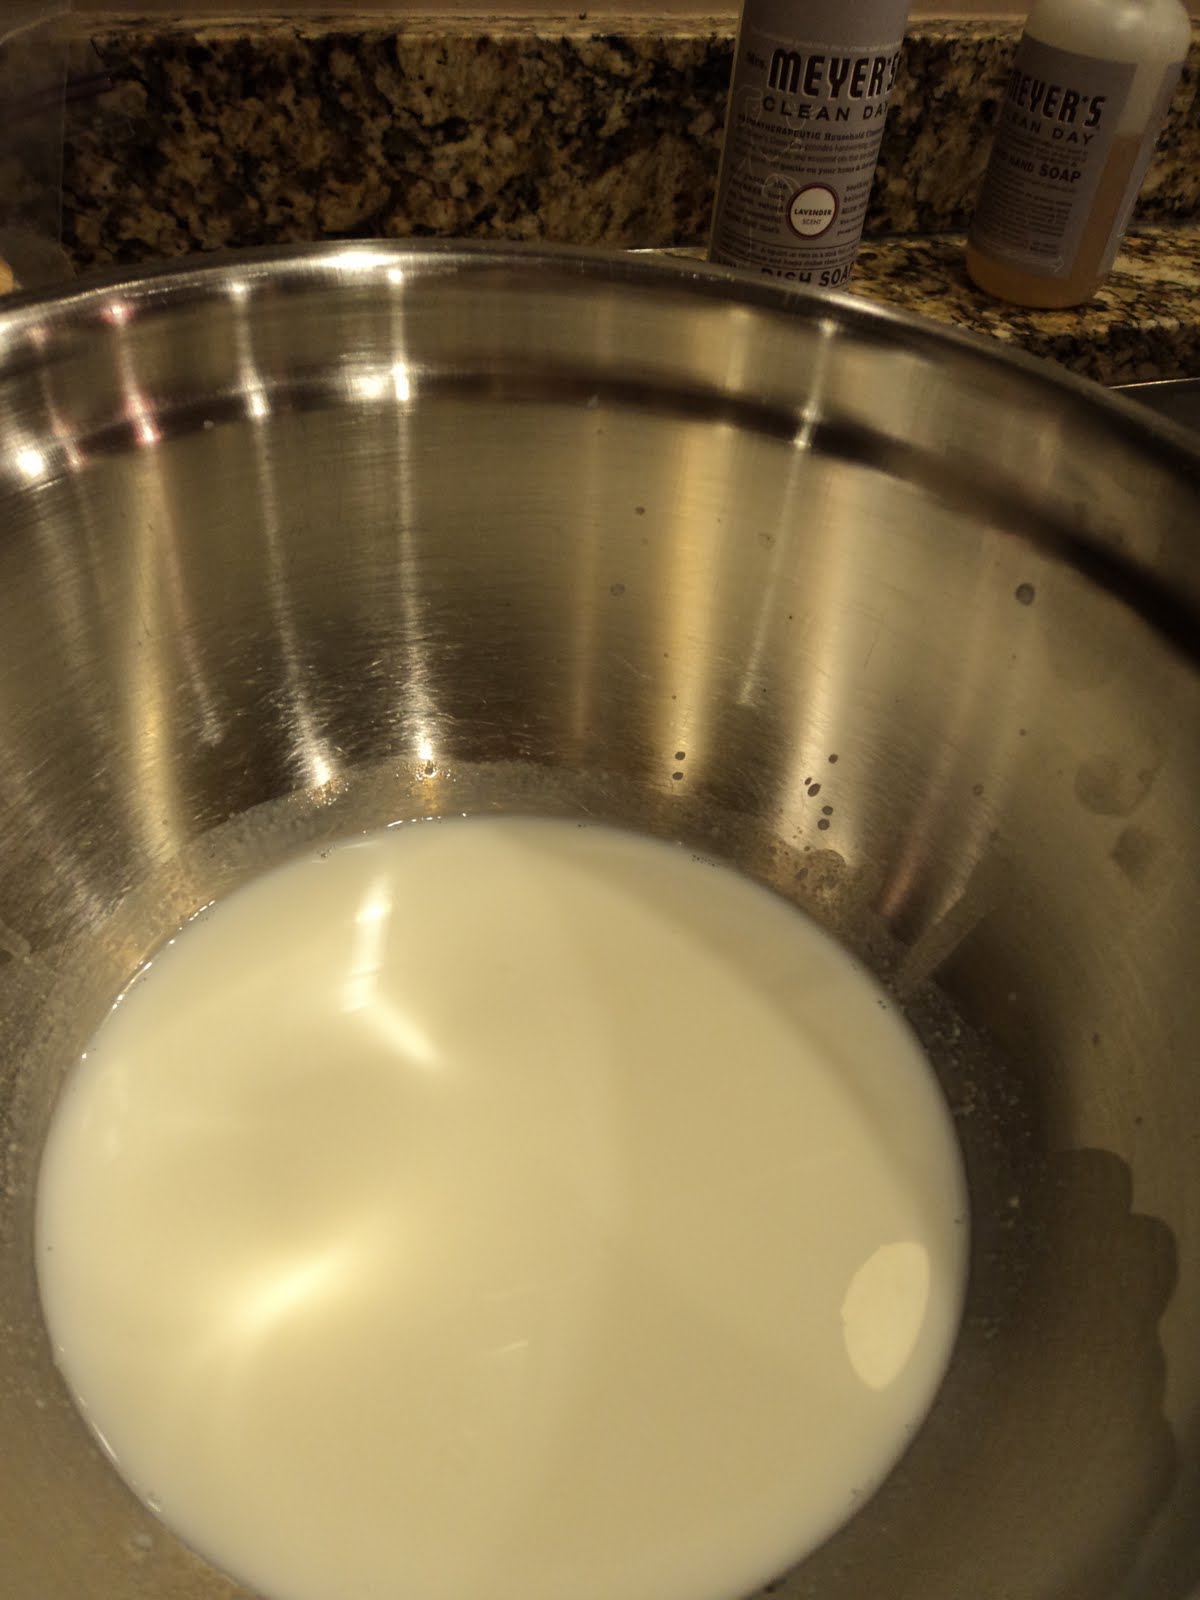
3. Add the milk to a large heavy-bottomed pan (not aluminum or copper). Place on the
stove and stir in the citric acid solution. Begin to heat the milk to 90 degrees.

4. Remove from heat and add the rennet; gently stir for about 1 minute.
5. Allow the milk mixture to sit undisturbed for 40 minutes.

6. Once the curd has formed, cut the curd into inch squares, and begin to stir the curd while gradually heating the milk mixture to 105 degrees.

7. Remove from heat and continue stirring (GENTLY) for about 5 minutes.
8. Transfer curd to a metal colander, and allow the whey to drain. Gently press the curd to help the whey separate.

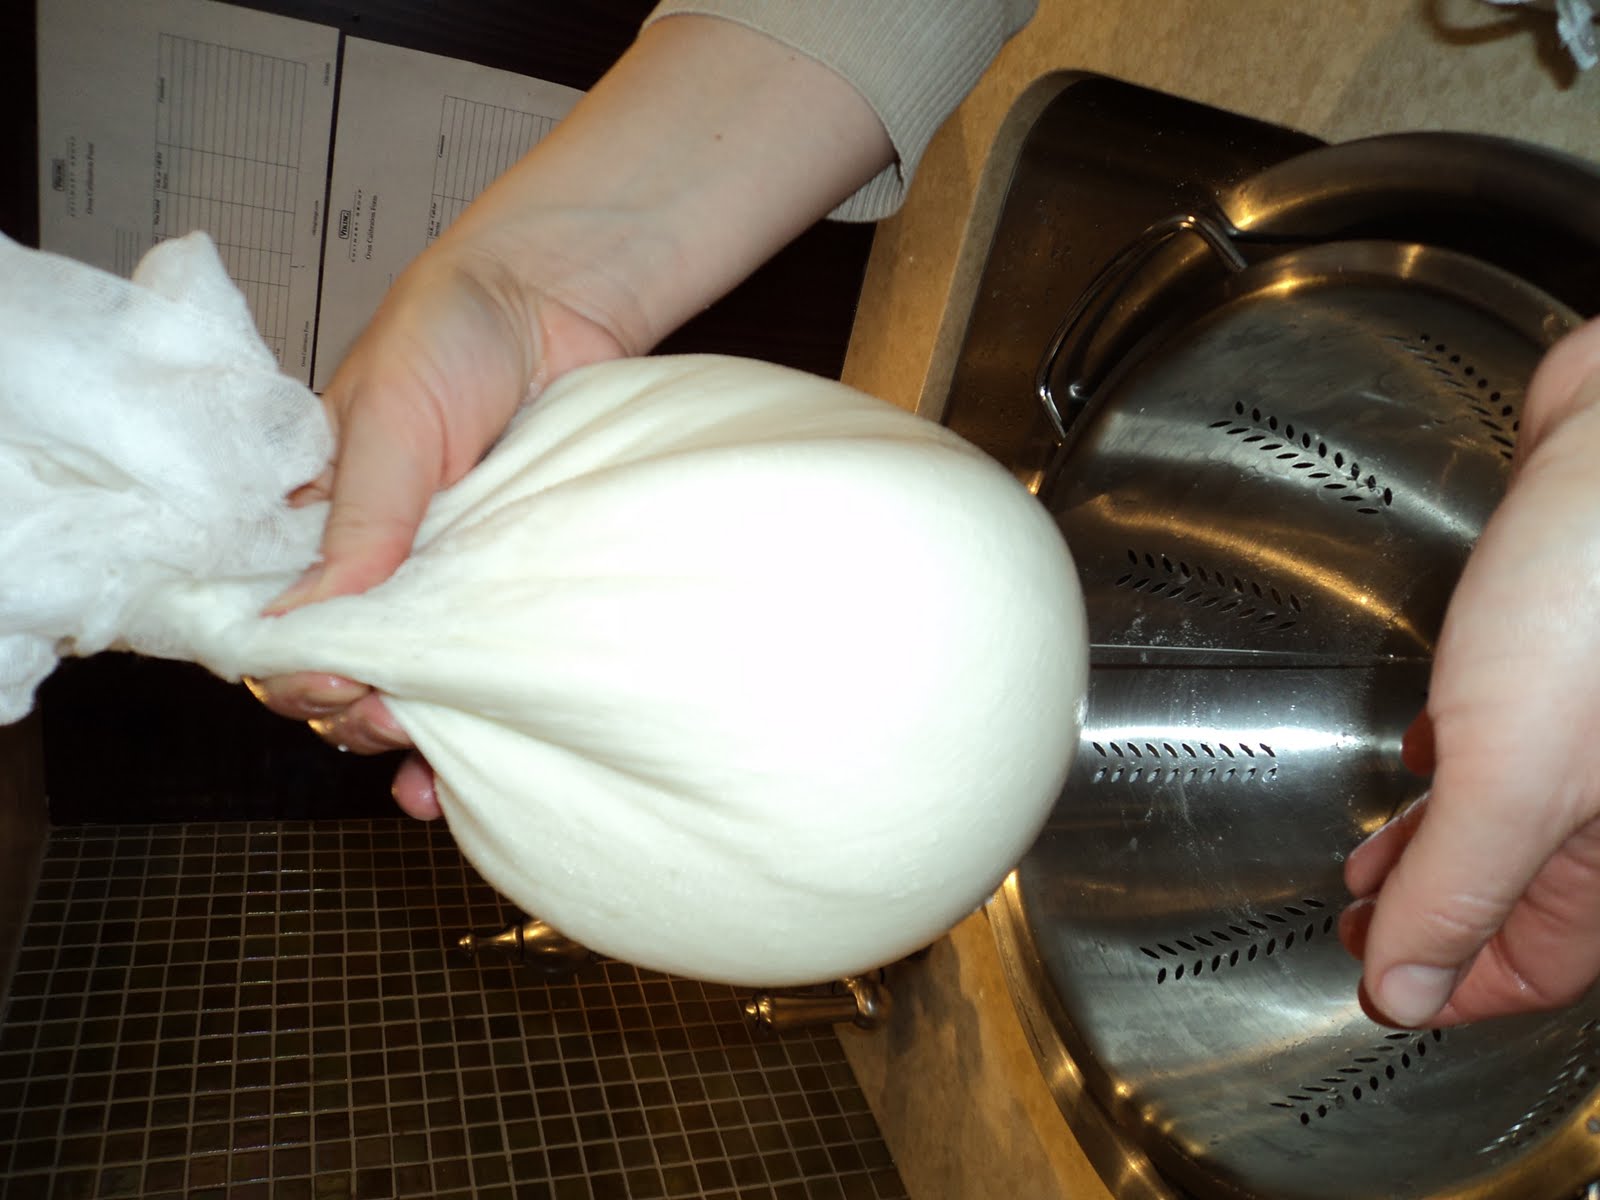
9. Heat curd in a microwave safe bowl for 30 seconds, and continue to drain off any excess whey.
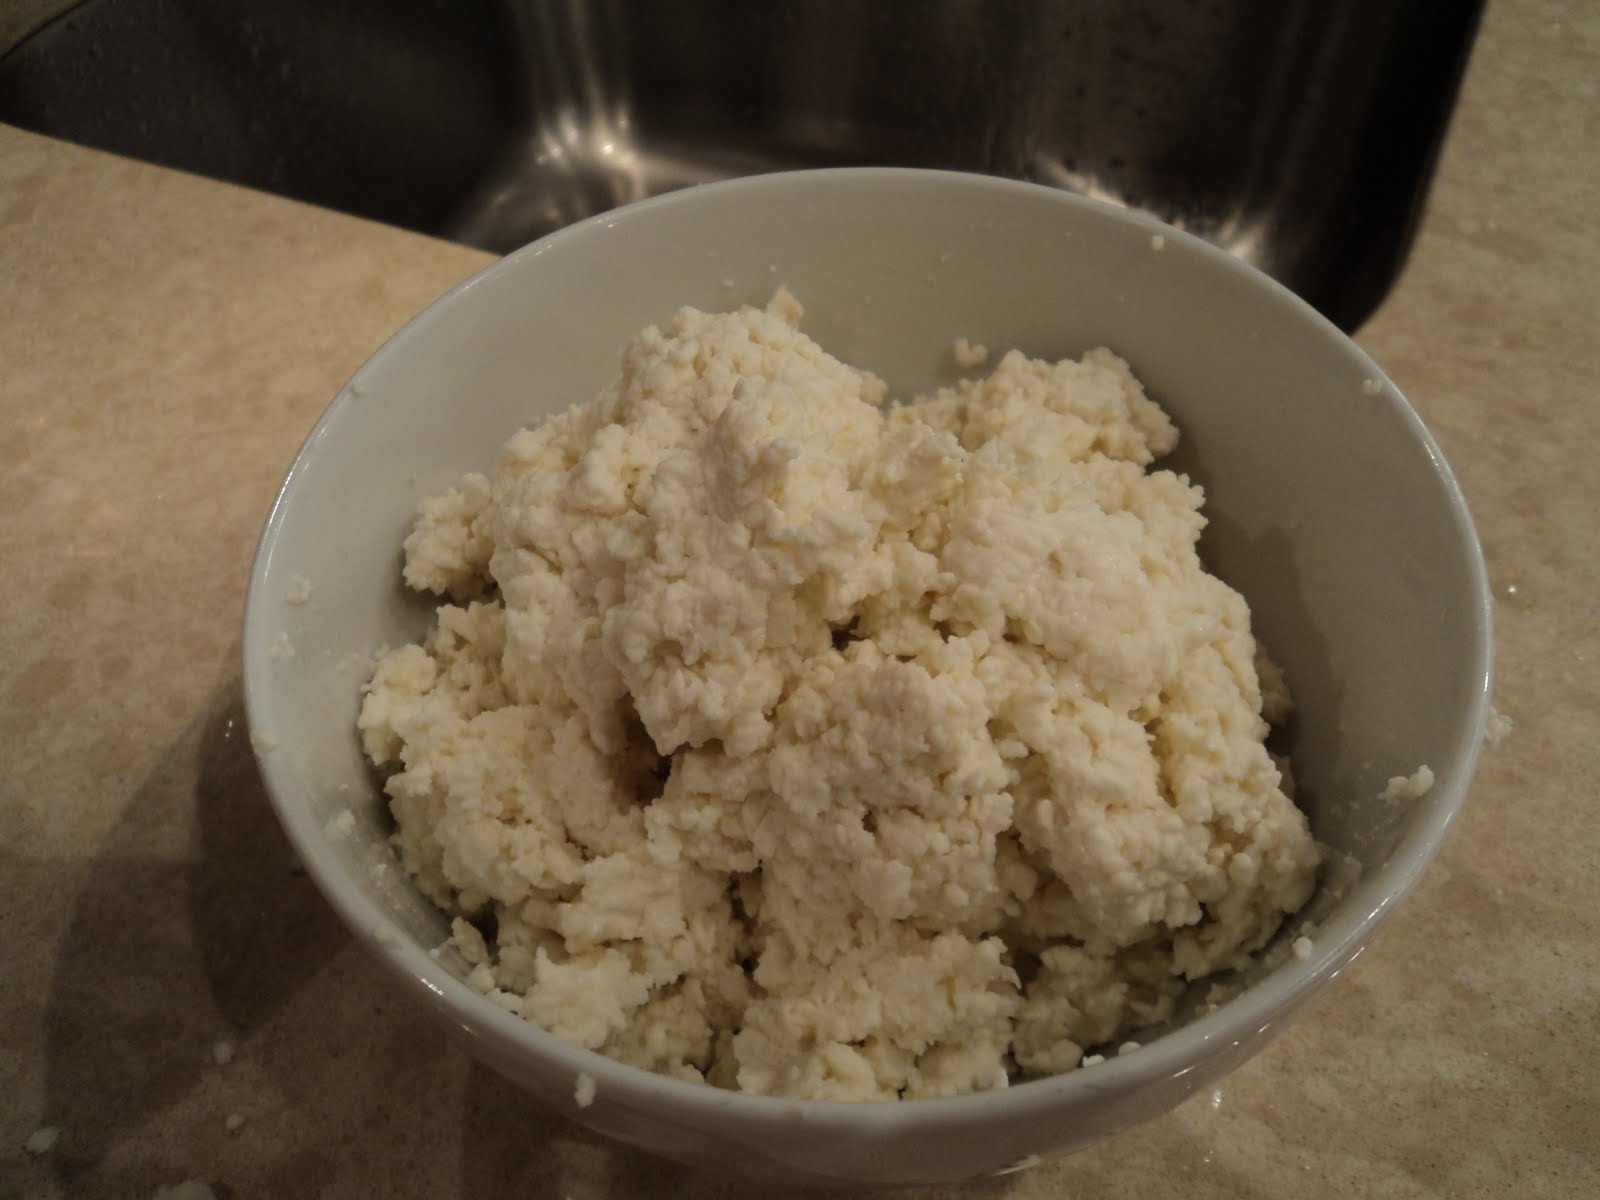
10. Continue heating the curd until it reaches about 130 degrees. Remove the cheese and
knead like you would bread (add 1 tsp salt at this point) until the cheese becomes smooth and shiny. Be careful not to burn yourself while working the cheese, as the cheese will be warm.

D. Actual Procedure and Observations:
This was an incredibly fun and interesting experiment. I can't believe how much milk we used, once again, to get such a small return of cheese but boy was it worth it. So much fun. We followed the directions just as described although we became very confused when our curds and whey looked nothing like any others in the class. They were very small and fine. We continued on and only had to drain our product for a few minutes and microwave it once for 1 minute. It was waxy, shiny and oh so good.
E. Discussion and Conclusion:
The making of cheese is not only incredible science but it is also so much fun! The process is divided into three steps: 1. the precipitation of casein into curds. This is done by bacteria which produce the lactic acid. The bacteria are infused in warm milk to obtain a balanced acidity which is absolutely essential for the addition of the rennet and also pushes out less desire able organisms from the mixture. Since we do not have a method for adding bacteria in this class we added the citric acid to form the curds and allow for the acidity to be introduced into the milk. The acid ferments the lactose to lactic acid and reduce the milk's pH to the appropriate range for the rennet to coagulate the casein. Rennet is added because it causes the casein micelles to aggregate, trapping fat globules and whey in the protein network. 2. Any free whey is drained off and the curds are cut, pressed and cooked and salted to remove any more that may be lingering. 3. The final stage deals with "ripening" of the curds. This, although sounds strange, offers a very intense and characteristic flavor.
A. Buttermilk Experiment #1 (Cultured Buttermilk)
B. Reagents:
1/2 cup fresh buttermilk
1 1/2 cups fresh milk
C. Procedures:
1. Add the fresh buttermilk and milk to a quart jar.
2. Put the lid on the jar and shake to mix the ingredients together.
3. Unscrew the lid to loosen the seal.

4. Allow mixture to sit out in a warm part of your room for 24 hours. After 24 hours, the mixture should have thickened and then needs to be refrigerated as any milk product.
*If you find that the buttermilk takes longer than 36 hours to thicken, the starter was no longer active.
D. Actual Procedure and Observations:
We combined the buttermilk and the milk together in a bowl during class and then transferred the buttermilk to a plastic bag. Once I got home I transferred the buttermilk to the glass quart bottle and covered it with plastic wrap. In the morning it was then moved to the fridge. The smell was very strong and the texture very thick.
E. Discussion and Conclusion:
Buttermilk differs from cheese in that it is not treated with rennet. It is instead thickened or curdled with only the action of acid-producing bacteria. Buttermilk was originally the low-fat liquid that was left over from the process of making butter. It was then contaminated by bacteria that simply lived in the air that were introduced during the churning process. This caused the milk to thicken and sour. Buttermilk is a great addition to recipes for its rich, buttery flavor.
In this recipe the buttermilk is created by adding buttermilk to milk. This works because the acid that is required for the creation of buttermilk, is found in the buttermilk that is being added. That is the main requirement for buttermilk.
A. Buttermilk Experiment #2 (Quick Buttermilk)
B. Reagents:
1 cup milk
1 tbsp vinegar
C. Procedures:
Mix milk and vinegar together, and allow mixture to sit for 10 minutes.

D. Actual Procedure and Observations:
The milk was added to the vinegar and time was allowed to let the milk be curdled and the reaction occur by the acid.
E. Discussion and Conclusion:
Differing from the buttermilk recipe above, this recipe relies on the acid from the vinegar when added to the milk to provide the chemical reaction that was needed to create the needed final product. About five minutes after the addition of the vinegar, the curdles were seen. It was fun to see how quickly the reaction took place and that there was actually something happening. I do feel however that if I had to guess, the buttermilk that we made above and took home is far superior to this version.
A. Yogurt Experiment #1
B. Reagents:
2 cups milk
1-2 tsp plain yogurt
C. Procedures:
1. Create a double boiler by placing a large stainless-steel boiler over a pan of boiling water.
2. Pour the milk into the double boiler and heat until the milk reaches 185 degrees.
3. Remove milk from the pan and allow to cool to 110 degrees.
4. Add the yogurt to the milk.
5. Cover bowl with plastic wrap. Wrap the bowl with several layers of towels and allow to sit for about 7 hours undisturbed.
6. Mix the cultured yogurt together.
7. Pour the yogurt into a sealed container and refrigerate for 24 hours.
D. Actual Procedure and Observations:
I find it funny to believe that the yogurt that is made comes from yogurt itself. I made yogurt in high school and remember thinking how strange it was to make yogurt from yogurt and how the first yogurt was ever made if you had to always make it from it! The recipe was very easy to follow and occurred without any changes or alterations to the recipe.
E. Discussion and Conclusion:
Yogurt is made from milk and dried milk solids are sometimes used to add a more abundant source of casein for the final solid product. A mixed culture of Lactobacillus bulgaricus and Streptococcus thermophilus is added to the milk when the temperature comes down low enough which is approximately 45 degrees Celsius. The reason why this recipe was unsuccessful is due to the fact that we added our bacteria when the milk was too warm. We checked the temperature of our milk before it was added and it showed to be within the range but our yogurt never thickened which tells us it was too warm and our bacteria was killed in the process. So although we followed the directions just as we needed to, I do believe that there was an error with our temperature reading that prevented us from having the appropriate temperature to not kill the bacteria.
A. Yogurt and Curry Marinade
B. Reagents:
¼ cup yogurt
2 tsp curry
2 tbsp vegetable oil
salt and pepper to taste
C. Procedure:
1. Combine all ingredients in a bowl and whisk together.
2. Set aside until ready to use.
D. Actual Procedure and Observations:
We were not apart of this recipe but I am sure Brian performed it just as directed.
E. Discussion and Conclusion:
The recipe uses the same chemistry as the yogurt recipe above as yogurt is the main ingredient providing the very specific taste and texture that is offered by the product. The addition of the curry, salt and pepper allows for better flavor and the oil for a smoother texture.
A. Buttermilk Biscuits Experiment #1
(Using Cultured Buttermilk)
B. Reagents:
4 cups all-purpose flour
1 tbsp salt
1 tbsp baking powder
1 tsp baking soda
1 cup vegetable shortening, cold, cut into 1/2-inch pieces
1 1/2 to 2 cups buttermilk, plus additional for brushing
C. Procedure:
1. Preheat the oven to 375 degrees.
2. Whisk together the flour, salt, baking powder, and baking soda.
3. Cut in the shortening using a pastry blender or your hands until the mixture resembles coarse crumbs.
4. Make a well in the center and add 1 cup buttermilk. Using your hands, quickly fold the dry ingredients into the buttermilk until a sticky dough forms. You may need to add more buttermilk.
5. Turn the dough out onto a floured surface, and gently fold the dough over itself 3 or 4 times to create layers.
6. Press the dough out to 1 1/2-inches thick and cut with a floured 3-inch biscuit cutter.
7. Lay the biscuits on a prepared cookie sheet and brush the tops with buttermilk.
8. Bake for 20 to 25 minutes until risen and golden brown.
D. Actual Procedure and Observations:
Since we were only making one recipe today for the biscuits, we just had to choose what type of buttermilk we would be adding. That of the purchase buttermilk or the quick buttermilk that was made earlier. We decided to use the purchased buttermilk as it seems to be a bit richer and smoother and creamier than the buttermilk that was made with just the milk and vinegar. This was a fun recipe for me because I have never made them before. The idea of adding the shortening in pieces and then cutting it into the flour was new and fascinating. And it worked! I was so excited to see that there was science behind it. Once the shortening was added and worked into the dry ingredients, the wet ingredients were added in the center and mixed in. We were careful not to over mix and once all ingredients were combined, we were careful to fold the dough allowing layers to form but not to over mix. We rolled out the dough and kept it thick so we would have the extra height and super large rolls. I do think that if we could have changed something in the recipe we would have added less salt. The salt was almost overwhelming.
E. Discussion and Conclusion:
The shortening was important in this recipe but also the baking powder. These are two ingredients that we are now very familiar with. Baking powder is the leavening agent that allows for the dough to rise. The shortening is almost key here as it breaks up the masses of gluten, thus weakening the structure and making the final product more tender. This is especially important in bisquits. The model of fat breaking up gluten sheets describes this recipe perfectly. Large chunks of shortening are intentionally left unmixed with the flour. After repeated rollings and foldings, the dough becomes a mass of alternating gluten and fat layers. When baked, it results in a stack of sparated flakes rather and a more integrated and smooth network. It is also very important to cut the dough with a sharp cutter as a dull one will destroy the layers that were created by compression and prevent the dough from swelling in the oven.
When we compared our final product to others we realized that ours had a better flavor. It seemed a bit richer and smoother on the tongue. If I had to do this recipe again I would definitely use a store purchased milk that has had the sufficient time to produce the flavors that are so desired.
A. Buttermilk Biscuits Experiment #2
(Using Quick Buttermilk)
B. Reagents:
4 cups all-purpose flour
1 tbsp salt
1 tbsp baking powder
1 tsp baking soda
1 cup vegetable shortening, cold, cut into 1/2-inch pieces
1 1/2 to 2 cups buttermilk, plus additional for brushing
C. Procedure:
1. Preheat the oven to 375 degrees.
2. Whisk together the flour, salt, baking powder, and baking soda.
3. Cut in the shortening using a pastry blender or your hands until the mixture resembles coarse crumbs.

4. Make a well in the center and add 1 cup buttermilk. Using your hands, quickly fold the dry ingredients into the buttermilk until a sticky dough forms. You may need to add more buttermilk.
5. Turn the dough out onto a floured surface, and gently fold the dough over itself 3 or 4 times to create layers.
6. Press the dough out to 1 1/2-inches thick and cut with a floured 3-inch biscuit cutter.
7. Lay the biscuits on a prepared cookie sheet and brush the tops with buttermilk.

8. Bake for 20 to 25 minutes until risen and golden brown.

D. Actual Procedure and Observations:
We did not perform this experiment as there was not enough time but our neighbors did and they were good. They followed the same procedure as we did although with the substituted buttermilk.
E. Discussion and Conclusion:
As mentioned above, the final product of the first recipe with the processed buttermilk offerred a much richer flavor that this latter recipe. I think this is simply due to the fact that the first buttermilk has had more time to process and allow the bacteria to establish an exceptional taste.


No comments:
Post a Comment