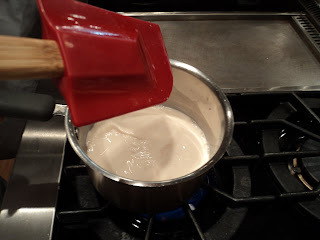
A. Dry Rub for Meat
B. Reagents:
1 tsp garlic powder
1 tsp onion powder
1 tbsp black pepper
1 tsp thyme
1 tsp parsley
1/4 tsp cayenne pepper
1/2 tsp cumin
1 tsp salt
A. Pork Loin Chops
B. Reagents:
Pork Loin
Dry Rub
C. Procedure:
1. Combine all spices together in small bowl and whisk together.
2. Rub pork loins with dry rub and allow them to rest for about 10 minutes.
3. Grill, broil, bake, or pan fry until cooked through. According to the FDA, an internal temperature of 160o is recommended.
4. Allow pork loin to rest for about 10 minutes.
D. Actual Procedure and Observations:
It will be difficult for me to comment on the actual procedure as I was not involved but I would have to assume that it went just as the recipe describes. The combined spices were rubbed all over the pork pieces and they were allowed to sit for a period of time. They were then sliced in individual servings and grilled.
E. Discussion and Conclusion:
After the cooking is complete (which requires a certain "touch") the next step is crucial. Before slicing into the meat, it must be allowed to rest for about 10-20 minutes. Most people avoid this step as human intuition is to eat it hot off the oven. Doing this is a huge disservice to the quality of the meat once it hits the palate. Why you ask? When meat is cooking the outer surface, called the dry surface as it is quickly dried out upon addition of heat, reaches the temperature of the heat that is being applied to it which can reach up to 400 degrees. The internal portion of the meat can only reach temperature similar to boiling water that is about 100 degress Celsius. As the cooking occurs the juices from the center of the meat are pulled to the outside. These juices cause the rich and intense flavors that assist in the browning reaction of the meat. The outside of the meat typically creates a crusty edge that allows the taste buds a party of flavor. I love meat and I must say that the first bite you get from a crusty piece of meat with tender juices on the inside is just like heaven! Yum. The importance of allowing the meat to sit after being removed from heat is all about the juices. The juices are pulled from center to the outside during the cooking process and then once removed from heat they are allowed to settle back into the cells of the meat and in the fibers. If cut immediately after cooking the juices will run out onto the plate being lost from the meat itself. If allowed to cool the juices will evenly distribute to the tissues of the meat allowing for an even distribution and giving each bite the tenderness and juiceiness that it deserves. One last important factor when dealing with meat is the knife that you use to cut it. A sharp knife must be used to protect the integrity of the fibers that were allowed to reconstruct with the resting of the meat.
Cooking Vegetables Three Different Ways
A. Roasted Vegetables
B. Reagents:
1 cup root vegetables, peeled and cut into one inch pieces
1 tbsp vegetable oil
salt and pepper to taste
C. Procedure:
1. In a large bowl toss the vegetables and oil together to coat. Salt and pepper to taste.
2. Place onto a prepared baking sheet and roast at 400 degrees for about 30 minutes or until cooked through.
3. Add salt and pepper to taste.
D. Actual Procedure and Observations:
I have never roasted vegetables in the oven as I am very used to blanching the veggies and then tossing them to the sautee but I do believe this is going to be my new choice of preparation. I chopped all of the vegetables in about 1 inch pieces and placed them all in a bowl. I then drizzled them with olive oil and added salt and pepper. They were baked in a pre-heated oven for about 25 mintues.
E. Discussion and Conclusion:
I was originally worried that I had over salted the veggies and that they would taste awful but fortunately for me they cooked long enough to have a bit of a crisp to them and with the extra salt they tasted almost like chips! I was so sad that we had to add them to pot of veggies for everyone to eat as I am positive ours were the best! (No offense to the other members of the class as they are all great people and should not be judged on their ability to roast veggies as amazing as I have.) The reason why these veggies turned out so amazing is due to the caramelizing reaction. This happens when the oil and the natural sugars of the vegetables seep out of the vegetable and with the heat provide a sweet, caramel and golden brown flavor and color. These were by far my favorite veggies of the evening. Yum.
A. Boiled Root Vegetables
B. Reagents:
1 cup root vegetables, peeled and cut into one-inch pieces
salt and pepper to taste
C. Procedures:
1. Place vegetables into a sauce pan and cover with about an inch of cold water.
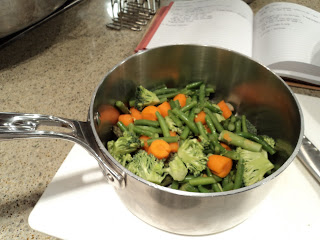
2. Bring to water to a boil, reduce heat, and simmer until vegetables are tender (about 10 minutes)
3. Add salt and pepper to taste.
D. Actual Procedure and Observation:
These veggie recipes are the most simple recipes that we have had to do all semester. We cleaned, cut, diced and added the veggies to a pot of water. Added heat, reduced heat, simmered and drained. Season to taste and eat.
E. Discussion and Conclusion:
The interesting thing about boiling vegetables is that they immediatley turn to an intense and vibrant color when first added to the hot water. This occurs because of the immediate expansion and release of gases which are trapped in the spaces that sit between the cells. These pockets of air dim and refract the color of the chloroplasts. When these pockets are heated they collapse and the pigments can be seen much more clearly. Unfortunately, the vegetables require a bit more time with heat to cook which pushes past this vibrant color phase and moves into a dull and depressing hue. The main reason for this is due to the replacement of magnesium by hydrogen in the cells of the vegetables. This process damages the cell structure and allows for the plant's own acids into contact with chlorophyll. Depressing! There is a way to prevent this from happening in the cooking process. If alkaline water is used in the cooking process it limits the available hydrogen ions which will restore the color to the veggies.
A. Steamed Vegetables
B. Reagents:
1 cup root vegetables, peeled and cut into one-inch pieces
salt and pepper to taste
C. Procedure:
1. Place vegetables into a steamer, cover, and steam for about 20 minutes or until tender.
2. Add salt and pepper to taste.
D. Actual Procedure and Observations:
The procedure of this recipe is also very easy as compared to the boiled vegetables. Prepare veggies and add to the steamer.
E. Discussion and Conclusion:
The chemistry behind this recipe is exact to that of the boiled veggies. The difference is the method that is used. In boiling, a lot of the vitamins and minerals found in the plant are thought to be lost in the boiled water. With the steamed, the plants are not sitting in water allowing for less of a loss of the nutrients.
A. Garlic Infused Balsamic Vinaigrette
B. Reagents:
2 tbsp balsamic vinegar
¼ cup canola oil
1 tbsp minced garlic
2 tsp Dijon mustard
Salt and pepper
Salad greens
C. Procedure:
1. Whisk together the garlic, balsamic vinegar, and Dijon mustard.
2. SLOWLY add the oil almost one drop at a time.
3. Add salt and pepper to taste.
4. Just before service, dress salad, toss, and serve.
D. Actual Procedure and Observations:
Although I wasn't responsible for making this recipe, I did watch as the group next to us did. It reminded me a lot of the recipe that we did on the first day of class...mayo. The group made sure to add the oil slowly as the recipe directs and as we learned with the mayonaise recipe, this is crucial.
E. Discussion and Conclusion:
The mustard serves as a bit of an emulsifier. Although the recipe is void of the egg yolk which is the main emulsifier, the mustard is a partial emulsifier that provides a thickening agent to the dressing. The oil must be added painfully slowly. If dumped in all at once it will take over the other ingredients. By whipping the oil in slowly and sufficiently, a thicker and more cohesive mixture is formed.
Saturday, April 9, 2011
Cakes, Cakes and More Cakes
A. Italian Meringue (Demonstration)
B. Reagents:
1 cup sugar
1/4 cup water
5 egg whites
1/4 cup sugar
2 cups room temperature butter
C. Procedure:
1. Combine the sugar and 1/4 cup water into a heavy sauce pan, and heat until the mixture reaches 240 degrees.
2. While the syrup is boiling, begin to whisk the egg whites until foamy. Add the 1/4 cup sugar and continue beating.
3. When the syrup reaches 240 degrees, slowly pour it into the whipped egg whites.
Continue whipping until the meringue has cooled to room temperature.
4. Add the butter a tablespoon at a time to the meringue until it is all incorporated.
Continue beating frosting until is smooth.
D. Actual Procedure and Observations:
As this recipe was completed by demonstration it was difficult to watch all of the steps that went into it. The first step of forming a syrup by boiling the water and sugar together is important as it dissolves the sugar cyrstals forming a smooth and consistent texture. The egg whites are whipped until a structure of white peaks is formed. With the addition of the syrup and the butter the meringue develops.
E. Discussion and Conclusion:
The most important ingredient in this recipe...no for once it isn't butter!...is the egg whites. The whites are whipped to form a foam which is due to the network of albumen proteins. The foam is simply made up of pockets of air surrounded by a thin film of water with protein molecules dissolved in it. The albumen is a thick solution that drains more slowly out of the buble walls allowing a structure to be formed like foam. Once the foam is constructed, one must be careful not to destroy it's integrity by adding all of the ingredients at once. This is the reason for the syrup to be added first and then the butter just one tablespoon at a time. Not following this step will allow the butter to take over the foam of the eggs and reduce the light product that is desired.
Two Methods to Mixing the Cakes:
While we have done a slew of recipes in this course calling for leavening agents and chemistry wonders to provide the moist and fluffy textures that we all crave especially when walking past a bakery or pastry shop, the important lesson to be learned today is not about the ingredients but technique. I find this very fitting of a lesson to be learned after learning the science behind our reagents. If we are doing a recipe and we have a firm understanding of the chemistry that we are using and our recipe still falters we may then blame our selves for having used a lackluster technique while baking. We then need only blame ourselves! As the following recipes are all based off the two methods described here, I have decided to explain each technique first and then provide a recipe specific guide for each recipe.
Creaming:
1. Cream sugar and butter together until light and fluffy.
2. Add eggs, vanilla, and lemon flavoring. Mix until smooth.
3. Add flour and baking powder. Mix until blended (about 30 seconds).
4. Pour batter into a 9-inch cake pan that has been greased and floured, and bake in a 350-degree oven for about 45 minutes or until done.
5. Cool and decorate as desired.
Discussion:
The creaming method is what I am most familiar with and the method that makes the most sense to me. The most important step is to cream the butter and the sugars together first before adding any additional ingredients. The recommended time to blend these two main playing ingredients together is 8-10 minutes. Mixing is immportaint as tiny air bubbles are incorporated, giving the cake a framework to rise in the oven and be light in texture. The eggs are added gradually in stages, one at a time, which ensures that the batter doesn’t curdle. The yolks help emulsify and hold moisture within the formed air cells and create a water-in-fat emulsion. Next the milk and other liquids are added in thouroughly incorporated and you finish with the dry ingredients.
One of the most common mistakes is to either over or under-cream the fat and sugar together, cream too quickly or to use fat that is too warm or too cold. When the mixture is over-creamed, creamed too fast or the fat is too warm, the fat starts to break down and release the previously creamed-in air bubbles. With butter, the milk solids separate, causing it to lose air and/or not be able to form air bubbles when the sugar crystals cut into it. And, if the fat is too cold, the sugar cannot cut into it because it's too hard preventing creaming from occuring. This results in a whole host of problems, such as dense, flat and flavorless recipes which no one wants!
When butter and sugar are creamed together, the rough sugar crystals cut into the fat. This creats air bubbles that are held in place by the cream. These small air bubbles serve as a nuclei for leavening gases and steam. If the fat and crystalline sugar is adequately creamed, the entraped air is more evenly dispersed among the fat leading to a better and more even rising cakes.
Two-stage method:
1. Add the sugar, butter, flour, baking powder, and salt to a mixing bowl. Cream together for about 5 minutes.
2. Add eggs, vanilla, and lemon flavoring. Continue mixing for about 3 minutes.
3. Pour batter into a 9-inch cake pan that has been greased and floured, and bake in a 350-degree oven for about 45 minutes or until done.
4. Cool and decorate as desired.
Discussion:
As this method is my least favorite to use, I know less about it. I have not had the desired results the times that I have used it so I tend to always use the creaming method. I must say however that when in a pinch for time or if I am just feeling a bit lazy I would use this method just to save a few. This allows you to add all of the ingredients at once with the exception typically of the eggs and vanilla or additional flavors. I assume (I have to assume as there is not much information confirming why these are added late in the game) that the eggs are added at a later point to allow the emulsion to take place and for the eggs not to be over whipped which would cause the cake to fall in the oven as it would not be able to support the air that is incorporated into the batter due to the over beating. (A bit of a run-on sentence but I think you get the point!) The vanilla and additional flavors are added at the end to preserve their intensity as the mixing may cause dilution.
The reason why I think I may not prefer this method is due to the lack of creaming of the sugar and the butter. I find that this step provides the most rich and moist of cake textures. You are expecting the Romeo and Juliet love story without the love. Too sad of a story to tell.
The two-step method does provide the same chemistry as the ingredients mimic each other in both forms of technique which provide a great base for the cake. It all comes down to a matter of....well for lack of a better word and no pun intended...TASTE!
A. Basic Yellow Cake Experiment #1 (Creaming Method)
B. Reagents:
1 1/2 cups cake flour
3/4 tsp baking powder
1/4 tsp salt
3/4 cups + 2 tbsp sugar
4 tbsp butter or shortening
1 egg
1 tsp vanilla
3/4 cup milk
C. Procedure:
1. Preheat oven to 350°F. Grease and flour one 9-inch cake pan.
2. In a bowl, combine flour, baking powder, and salt; whisk together with a wire whisk.
3. Cream butter and sugar for about 3 minutes with a mixer on medium high.
4. Beat in eggs one at a time.
5. Add vanilla and mix until completely combined.
6. Slowly add flour alternately with milk. At end of addition, batter should be smooth.
7. Pour the batter into a 9-inch cake pan that has been greased and floured, and bake for 20 to 25 minutes.
8. Cool 5 minutes in pan; then, invert onto a rack and cool completely before frosting.
D. Actual Procedure and Observations:
This recipe uses the "true" creaming method technique which is my favorite...as if you didn't already read that. Everything else in the recipe worked exactly as described above with no alterations. The butter and the sugar were creamed together first. The dry ingredients were blended seperately until well incorporated. After the creaming occurred with the butter and sugar (which we did for about 4 minutes) there was a nice fluffy consistency that developed. The dry ingredients were added and then the eggs one at a time.
E. Discussion and Conclusion:
The description that was used above for the creaming method is definitley applicable to this recipe. To offer a bit more sciene there is a difference between butter and shortening. We have learned that shortening is best use use with baking as it provides the ideal creaming properties. The smaller the average crystal size in a given mixture of lipids, the more it that can be incorporated because there are more and smaller air spaces in between the crystals. While the shortening provides the best structure, we used the butter as I love (I know you are getting sick of hearing it) butter!
Unfortunately our cake looked great in the oven and the second we removed it, it collapsed into a sunken volcano. What happened?!? It was the saddest thing to witness. It may have been due to the fact that we did not use the high ratio shortening. This would have provided a stronger network for the cake so that when the heat was removed it could have better supported the structure of the cake. It may have also been due to every one consistently opening and closing the oven door...which I am going to put my money on. Although we did end up having to put the butter in the microwave to soften it and we may have taken it too far making it too soft which would have caused the cake to fall as well.
A. Basic Yellow Cake Experiment #2
(with high ratio shortening method)
B. Reagents:
1 1/2 cups cake flour
3/4 tsp baking powder
1/4 tsp salt
3/4 cup + 2 tbsp sugar
4 tbsp high ration shortening
1 egg
1 tsp vanilla
3/4 cup milk
C. Procedure:
1. Preheat oven to 350°F. Grease and flour one 9-inch cake pan.
2. In bowl, combine flour, baking powder, salt, sugar, shortening, and egg. Mix together with a mixer on medium high for about 8 minutes.
3. Add milk and vanilla. Mix for an additional 3 minutes.
4. Pour the batter into a 9-inch cake pan that has been greased and floured, and bake for 20 to 25 minutes.
5. Cool 5 minutes in pan; then, invert onto a rack and cool completely before frosting.
D. Actual Procedure and Observations:
Talk about a fast recipe. Everything was added all at once (including the egg). We did use the high ration shortening as well so the recipe was followed to a T so that we could accurately perform the experiments and compare the two cakes to see which one was better.
E. Discussion and Conclusion:
The cake looked great in the oven and we were worried about it falling but it was perfect. It was gorgeous. I assume it was the shortening that provided the structure of the cake. The flavor however, was not as great nor was the texture. It was very waxy and left a film of wax on the roof of my mouth. The cake was also dry and difficult to swallow. Wow. I guess I really don't like shortening in my recipes or using the two-step method. I have chosen sides!
A. Basic Lemon Cake Experiment #3
(choose mixing method)
B. Reagents:
1 cup sugar
1 cup softened butter
3 eggs
1 tsp vanilla
2 tablespoon lemon extract
3/4 cup +2 tbsp all purpose flour
1 tsp baking powder
1/4 tsp salt
C. Procedure:
Choose mixing method: Creaming or Two-step
D. Actual Procedure and Observations:
There was not lemon extract available so we used lemon zest which provided a fresh lemon flavor but not as strong as I would have liked. We also chose to use butter in the recipe and to use the creaming method. We hoped that we would be able to do a much better job than with the first cake...but read on to find out what happened! Butter and sugar were creamed together first. The dry ingredients were mixed sepertately and then added to the creamed ingredients. Eggs and flavorings were then added and headed to the oven.
E. Discussion and Conclusion:
Although we were extra cautious to perform our duties in expert control we were unable to successfully execute a perfect cake. I loved the lemon flavor (although wishing it were more intense) and the flavor that the butter offered, but once again the cake fell and executed a look alike of Barbie's swimming pool. So sad. I must assume that this occurred due to the fact that we should have added more flour to make up for the altitude at which we live here in Utah or blame our classmates for constantly opening the oven door to check their cakes. While I truly adore my classmates I must say it is a tie between the two. I know it wasn't due to the temperature of the butter because we were very cautious to make sure it was at exactly the right temperature.
Overall, I walked away from this experiment day with a vast knowledge on understanding why certain instructions show up in the recipes. Rather than wondering why I am doing one step with exact detail, I now understand and am happy to do it...as long as it tastes great!
B. Reagents:
1 cup sugar
1/4 cup water
5 egg whites
1/4 cup sugar
2 cups room temperature butter
C. Procedure:
1. Combine the sugar and 1/4 cup water into a heavy sauce pan, and heat until the mixture reaches 240 degrees.
2. While the syrup is boiling, begin to whisk the egg whites until foamy. Add the 1/4 cup sugar and continue beating.
3. When the syrup reaches 240 degrees, slowly pour it into the whipped egg whites.
Continue whipping until the meringue has cooled to room temperature.
4. Add the butter a tablespoon at a time to the meringue until it is all incorporated.
Continue beating frosting until is smooth.
D. Actual Procedure and Observations:
As this recipe was completed by demonstration it was difficult to watch all of the steps that went into it. The first step of forming a syrup by boiling the water and sugar together is important as it dissolves the sugar cyrstals forming a smooth and consistent texture. The egg whites are whipped until a structure of white peaks is formed. With the addition of the syrup and the butter the meringue develops.
E. Discussion and Conclusion:
The most important ingredient in this recipe...no for once it isn't butter!...is the egg whites. The whites are whipped to form a foam which is due to the network of albumen proteins. The foam is simply made up of pockets of air surrounded by a thin film of water with protein molecules dissolved in it. The albumen is a thick solution that drains more slowly out of the buble walls allowing a structure to be formed like foam. Once the foam is constructed, one must be careful not to destroy it's integrity by adding all of the ingredients at once. This is the reason for the syrup to be added first and then the butter just one tablespoon at a time. Not following this step will allow the butter to take over the foam of the eggs and reduce the light product that is desired.
Two Methods to Mixing the Cakes:
While we have done a slew of recipes in this course calling for leavening agents and chemistry wonders to provide the moist and fluffy textures that we all crave especially when walking past a bakery or pastry shop, the important lesson to be learned today is not about the ingredients but technique. I find this very fitting of a lesson to be learned after learning the science behind our reagents. If we are doing a recipe and we have a firm understanding of the chemistry that we are using and our recipe still falters we may then blame our selves for having used a lackluster technique while baking. We then need only blame ourselves! As the following recipes are all based off the two methods described here, I have decided to explain each technique first and then provide a recipe specific guide for each recipe.
Creaming:
1. Cream sugar and butter together until light and fluffy.
2. Add eggs, vanilla, and lemon flavoring. Mix until smooth.
3. Add flour and baking powder. Mix until blended (about 30 seconds).
4. Pour batter into a 9-inch cake pan that has been greased and floured, and bake in a 350-degree oven for about 45 minutes or until done.
5. Cool and decorate as desired.
Discussion:
The creaming method is what I am most familiar with and the method that makes the most sense to me. The most important step is to cream the butter and the sugars together first before adding any additional ingredients. The recommended time to blend these two main playing ingredients together is 8-10 minutes. Mixing is immportaint as tiny air bubbles are incorporated, giving the cake a framework to rise in the oven and be light in texture. The eggs are added gradually in stages, one at a time, which ensures that the batter doesn’t curdle. The yolks help emulsify and hold moisture within the formed air cells and create a water-in-fat emulsion. Next the milk and other liquids are added in thouroughly incorporated and you finish with the dry ingredients.
One of the most common mistakes is to either over or under-cream the fat and sugar together, cream too quickly or to use fat that is too warm or too cold. When the mixture is over-creamed, creamed too fast or the fat is too warm, the fat starts to break down and release the previously creamed-in air bubbles. With butter, the milk solids separate, causing it to lose air and/or not be able to form air bubbles when the sugar crystals cut into it. And, if the fat is too cold, the sugar cannot cut into it because it's too hard preventing creaming from occuring. This results in a whole host of problems, such as dense, flat and flavorless recipes which no one wants!
When butter and sugar are creamed together, the rough sugar crystals cut into the fat. This creats air bubbles that are held in place by the cream. These small air bubbles serve as a nuclei for leavening gases and steam. If the fat and crystalline sugar is adequately creamed, the entraped air is more evenly dispersed among the fat leading to a better and more even rising cakes.
Two-stage method:
1. Add the sugar, butter, flour, baking powder, and salt to a mixing bowl. Cream together for about 5 minutes.
2. Add eggs, vanilla, and lemon flavoring. Continue mixing for about 3 minutes.
3. Pour batter into a 9-inch cake pan that has been greased and floured, and bake in a 350-degree oven for about 45 minutes or until done.
4. Cool and decorate as desired.
Discussion:
As this method is my least favorite to use, I know less about it. I have not had the desired results the times that I have used it so I tend to always use the creaming method. I must say however that when in a pinch for time or if I am just feeling a bit lazy I would use this method just to save a few. This allows you to add all of the ingredients at once with the exception typically of the eggs and vanilla or additional flavors. I assume (I have to assume as there is not much information confirming why these are added late in the game) that the eggs are added at a later point to allow the emulsion to take place and for the eggs not to be over whipped which would cause the cake to fall in the oven as it would not be able to support the air that is incorporated into the batter due to the over beating. (A bit of a run-on sentence but I think you get the point!) The vanilla and additional flavors are added at the end to preserve their intensity as the mixing may cause dilution.
The reason why I think I may not prefer this method is due to the lack of creaming of the sugar and the butter. I find that this step provides the most rich and moist of cake textures. You are expecting the Romeo and Juliet love story without the love. Too sad of a story to tell.
The two-step method does provide the same chemistry as the ingredients mimic each other in both forms of technique which provide a great base for the cake. It all comes down to a matter of....well for lack of a better word and no pun intended...TASTE!
A. Basic Yellow Cake Experiment #1 (Creaming Method)
B. Reagents:
1 1/2 cups cake flour
3/4 tsp baking powder
1/4 tsp salt
3/4 cups + 2 tbsp sugar
4 tbsp butter or shortening
1 egg
1 tsp vanilla
3/4 cup milk
C. Procedure:
1. Preheat oven to 350°F. Grease and flour one 9-inch cake pan.
2. In a bowl, combine flour, baking powder, and salt; whisk together with a wire whisk.
3. Cream butter and sugar for about 3 minutes with a mixer on medium high.
4. Beat in eggs one at a time.
5. Add vanilla and mix until completely combined.
6. Slowly add flour alternately with milk. At end of addition, batter should be smooth.
7. Pour the batter into a 9-inch cake pan that has been greased and floured, and bake for 20 to 25 minutes.
8. Cool 5 minutes in pan; then, invert onto a rack and cool completely before frosting.
D. Actual Procedure and Observations:
This recipe uses the "true" creaming method technique which is my favorite...as if you didn't already read that. Everything else in the recipe worked exactly as described above with no alterations. The butter and the sugar were creamed together first. The dry ingredients were blended seperately until well incorporated. After the creaming occurred with the butter and sugar (which we did for about 4 minutes) there was a nice fluffy consistency that developed. The dry ingredients were added and then the eggs one at a time.
E. Discussion and Conclusion:
The description that was used above for the creaming method is definitley applicable to this recipe. To offer a bit more sciene there is a difference between butter and shortening. We have learned that shortening is best use use with baking as it provides the ideal creaming properties. The smaller the average crystal size in a given mixture of lipids, the more it that can be incorporated because there are more and smaller air spaces in between the crystals. While the shortening provides the best structure, we used the butter as I love (I know you are getting sick of hearing it) butter!
Unfortunately our cake looked great in the oven and the second we removed it, it collapsed into a sunken volcano. What happened?!? It was the saddest thing to witness. It may have been due to the fact that we did not use the high ratio shortening. This would have provided a stronger network for the cake so that when the heat was removed it could have better supported the structure of the cake. It may have also been due to every one consistently opening and closing the oven door...which I am going to put my money on. Although we did end up having to put the butter in the microwave to soften it and we may have taken it too far making it too soft which would have caused the cake to fall as well.
A. Basic Yellow Cake Experiment #2
(with high ratio shortening method)
B. Reagents:
1 1/2 cups cake flour
3/4 tsp baking powder
1/4 tsp salt
3/4 cup + 2 tbsp sugar
4 tbsp high ration shortening
1 egg
1 tsp vanilla
3/4 cup milk
C. Procedure:
1. Preheat oven to 350°F. Grease and flour one 9-inch cake pan.
2. In bowl, combine flour, baking powder, salt, sugar, shortening, and egg. Mix together with a mixer on medium high for about 8 minutes.
3. Add milk and vanilla. Mix for an additional 3 minutes.
4. Pour the batter into a 9-inch cake pan that has been greased and floured, and bake for 20 to 25 minutes.
5. Cool 5 minutes in pan; then, invert onto a rack and cool completely before frosting.
D. Actual Procedure and Observations:
Talk about a fast recipe. Everything was added all at once (including the egg). We did use the high ration shortening as well so the recipe was followed to a T so that we could accurately perform the experiments and compare the two cakes to see which one was better.
E. Discussion and Conclusion:
The cake looked great in the oven and we were worried about it falling but it was perfect. It was gorgeous. I assume it was the shortening that provided the structure of the cake. The flavor however, was not as great nor was the texture. It was very waxy and left a film of wax on the roof of my mouth. The cake was also dry and difficult to swallow. Wow. I guess I really don't like shortening in my recipes or using the two-step method. I have chosen sides!
A. Basic Lemon Cake Experiment #3
(choose mixing method)
B. Reagents:
1 cup sugar
1 cup softened butter
3 eggs
1 tsp vanilla
2 tablespoon lemon extract
3/4 cup +2 tbsp all purpose flour
1 tsp baking powder
1/4 tsp salt
C. Procedure:
Choose mixing method: Creaming or Two-step
D. Actual Procedure and Observations:
There was not lemon extract available so we used lemon zest which provided a fresh lemon flavor but not as strong as I would have liked. We also chose to use butter in the recipe and to use the creaming method. We hoped that we would be able to do a much better job than with the first cake...but read on to find out what happened! Butter and sugar were creamed together first. The dry ingredients were mixed sepertately and then added to the creamed ingredients. Eggs and flavorings were then added and headed to the oven.
E. Discussion and Conclusion:
Although we were extra cautious to perform our duties in expert control we were unable to successfully execute a perfect cake. I loved the lemon flavor (although wishing it were more intense) and the flavor that the butter offered, but once again the cake fell and executed a look alike of Barbie's swimming pool. So sad. I must assume that this occurred due to the fact that we should have added more flour to make up for the altitude at which we live here in Utah or blame our classmates for constantly opening the oven door to check their cakes. While I truly adore my classmates I must say it is a tie between the two. I know it wasn't due to the temperature of the butter because we were very cautious to make sure it was at exactly the right temperature.
Overall, I walked away from this experiment day with a vast knowledge on understanding why certain instructions show up in the recipes. Rather than wondering why I am doing one step with exact detail, I now understand and am happy to do it...as long as it tastes great!
Sour Cream or Sour Dream? I Dig the Sour!
A. Sourdough Starter
B. Reagents:
2 cups flour
2 cups water
½ tsp yeast
C. Procedure:
1. Place flour, water, and yeast into a large non reactive bowl. Mix together and loosely cover with plastic wrap.
2. Allow to sit out overnight or about 12 hours. Make sure the bowl is large enough to
contain the mixture as it ferments.
3. To replenish and feed your sourdough start, remove one cup of sourdough start and
replenish with equal parts of flour and water.
D. Actual Procedure and Observations:
I added all of the ingredients into my large, red, plastic bowl (which is required as opposed to a copper bowl...explanation to follow) and covered it with plastic wrap and let it sit out on the counter overnight.
E. Discussion and Conclusion:
Certain recipes call for nonreactive bowls (or other cookware) because many foods—especially salty or acidic ones—react with untreated surfaces such as iron, copper, and aluminum. When the foods react, the metals dissolve, and the foods pick up a metallic taste. High levels of these elements can be toxic when consumed. So to prevent this a plastic bowl was used.
Sourdough is a dough that contains lactobacillus culture. Sourdough starter is made with a small amount of old dough saved from a prior batch, and is sometimes called mother dough or chef. This small amount of old-dough starter contains the culture, and its weight is increased by additions of new dough and mixing or kneading followed by rest or leavening periods. A small amount of the resulting dough is then saved to use as old-dough starter for the next batch.[1] As long as this starter culture is fed flour and water weekly, it can stay at room temperature indefinitely. Rather than actually adding yeast to the recipe directly, the leavening agent is found in the starter.
A. Sourdough Brownies
B. Reagents:
1 cup melted butter
1 cup Dutch process cocoa
1 cup sourdough starter
1 tbsp vanilla
4 eggs, slightly beaten
2 cups sugar
¾ cup flour
1 tsp salt
½ cup chopped walnuts
C. Procedure:
1. In a large bowl, combine the melted butter and cocoa, and stir together well.
2. Add sourdough starter, vanilla, eggs, sugar, flour, salt, and nuts. Stir to combine all ingredients well.
3. Pour into a greased and floured cake pan, and bake at 400 degrees for 30 minutes (or until a toothpick comes out clean).
4. Allow to cool, frost with your favorite frosting and serve.
D. Actual Procedure and Observations:
This recipe was a fun one to make. It felt foreign to add the sourdough starter rather than adding baking soda or baking powder. The butter and cocoa were added together and mixed well to ensure that the cocoa was completely dissolved by the butter. It actually was very pretty and looked completely rich. All ingredients were added to the first mixture and placed in the pre-heated oven.
E. Discussion and Conclusion:
I was very skeptical that these brownies were going to turn out the way that I had hoped becuase of the taste of the sourdough. I thought it was a strange ingredient to add to a sweet and yummy brownie but I went ahead with it anyway. I did make one mistake thought that I will never make again. When I transferred the batter into the pan I tapped it against the counter very hard and several times. This I thought was the proper thing to do to spread out the batter and to "get the air bubble out"! Are you serious? As I was explaining to Jen the theory behind what I was doing (she looked at me like I was nuts!)
I realized how silly I sounded and how I was not at all demonstrating my knowledge that I had just gained by preparing for this recipe.
The recipe is void from baking powder or baking soda which we are so versed in using in our recipes. We used yeast in bread but never have we used a sourdough which contains the yeast, to be our sole leavening agent. The air bubbles that are trapped in the flour, water and yeast mixture are released as carbon dioxide and trapped in the gluten structure of the recipe. This we have already learned. I think the purpose of us doing this recipe now is so that we may demonstrate our knowledge of the various ways that we can have an end result of fluffy and air packed structure.
I loved these brownies. There was a perfect combination of sweet and savory and an amazing fun flavor of the sourdough. Once again....yum.
A. Chocolate Eclairs
B. Reagents:
basic pate choux dough:
1 cup water
1 stick butter
1 cup flour
pinch salt
6 eggs
C. Procedure:
1. In a large sauce pan, add water, salt, and butter. Bring to a boil and make sure butter has melted.
2. Add flour and mix together until a large ball forms.
3. Remove from heat, add one egg at a time, and incorporate completely. Continue adding
enough eggs to reach the desired consistency.
4. Pipe desired shape of éclairs onto a parchment-lined baking sheet.
5. Bake in a 425-degree oven until golden brown.
6. Remove and allow to cool. Fill with pastry cream and dip in melted chocolate.
D. Actual Procedure and Observations:
For me, this recipe was a piece of cake (no pun intended). I have made eclairs so many times before that today was no different. The butter and water were melted and the salt was added to heat. Once the flour was added and stirring began a ball formed looking similar to a runny pie dough. Once removed from heat the eggs were added one at a time. This was important to do as otherwise the eggs would take over the recipe and be a soupy mess. The batter was spooned onto a cookie sheet with parchment paper placed to prevent sticking and baked for about 35 mintues.
E. Discussion and Conclusion:
The key chemistry in this recipe is the addition of the flour to the butter/water/salt mixture and then the addition of the eggs. Eggs, eggs, eggs! They are so crucial to the foundation of baking and cooking. While the first few ingredients are important, the eggs are what provide the structure of the recipe. An eclair is meant to be fluffly and hollow in the middle and this can only be accomplished by the structure of the eggs. The purpose of adding the eggs one at a time is to keep them from over-taking the batter. They must be slowly incorporated to allow emulsification to occur. Eggs contribute three main ingredients: water, protein and fat. The eggs coagulate into a solid when heated which is what provides to the structure of the eclair. The egg yolk also contributes to the color and eggy flavor.
A. Pastry Cream
B. Reagents:
1/3 cup sugar
¼ cup cornstarch
1 tbsp vanilla
6 eggs light beaten
2 cups milk
C. Procedure:
1. In a large heat-proof bowl, add sugar and cornstarch and whisk together.
2. Add eggs and beat mixture together.
3. In a heavy-bottom sauce pan, add milk and vanilla, and bring to a boil.
4. Temper egg mixture and cook over low heat until mixture is thick; do not boil.
5. Strain pastry cream and cover with plastic wrap to prevent film from developing.
6. Pastry cream will set quite firm. To lighten pastry cream, simply fold some whipped
cream into the pastry cream.
D. Actual Procedure and Observations:
This was a fun recipe to do as it was slightly different than the puddings that we made before but much the same. Rather than adding the eggs one at a time, we were able to dump them all in at once. This made the recipe go by much faster. Once we added the heat the mixture slowly became thicker. We had to temper the eggs so that they did not scramble. No one wants chunky in their cream right? We cooked the mixture until it thickened but definitely before it began to boil and then removed it from the heat.
E. Discussion and Conclusion:
Once again the eggs are playing the major role in the recipe not only for their structure but also lending a huge hand in flavor. While they provide a great base to creating the thick cream, the cornstarch also has a bit of the control as a thickening agent. Corn starch becomes a very important ingredient when it is added to hot water. The energy of the molecules when heat is added is sufficient to disrupt the weaker, amorphous regions of the granule. This permits hydrogen bonding between starch and water molecules. The granules then absorb water and swell up, therby putting greater and greater stress on the crystalline regions creating a thickening property and a very yummy cream for the inside of the pastry. Top with melted chocolate and YUM.
B. Reagents:
2 cups flour
2 cups water
½ tsp yeast
C. Procedure:
1. Place flour, water, and yeast into a large non reactive bowl. Mix together and loosely cover with plastic wrap.
2. Allow to sit out overnight or about 12 hours. Make sure the bowl is large enough to
contain the mixture as it ferments.
3. To replenish and feed your sourdough start, remove one cup of sourdough start and
replenish with equal parts of flour and water.
D. Actual Procedure and Observations:
I added all of the ingredients into my large, red, plastic bowl (which is required as opposed to a copper bowl...explanation to follow) and covered it with plastic wrap and let it sit out on the counter overnight.
E. Discussion and Conclusion:
Certain recipes call for nonreactive bowls (or other cookware) because many foods—especially salty or acidic ones—react with untreated surfaces such as iron, copper, and aluminum. When the foods react, the metals dissolve, and the foods pick up a metallic taste. High levels of these elements can be toxic when consumed. So to prevent this a plastic bowl was used.
Sourdough is a dough that contains lactobacillus culture. Sourdough starter is made with a small amount of old dough saved from a prior batch, and is sometimes called mother dough or chef. This small amount of old-dough starter contains the culture, and its weight is increased by additions of new dough and mixing or kneading followed by rest or leavening periods. A small amount of the resulting dough is then saved to use as old-dough starter for the next batch.[1] As long as this starter culture is fed flour and water weekly, it can stay at room temperature indefinitely. Rather than actually adding yeast to the recipe directly, the leavening agent is found in the starter.
A. Sourdough Brownies
B. Reagents:
1 cup melted butter
1 cup Dutch process cocoa
1 cup sourdough starter
1 tbsp vanilla
4 eggs, slightly beaten
2 cups sugar
¾ cup flour
1 tsp salt
½ cup chopped walnuts
C. Procedure:
1. In a large bowl, combine the melted butter and cocoa, and stir together well.
2. Add sourdough starter, vanilla, eggs, sugar, flour, salt, and nuts. Stir to combine all ingredients well.
3. Pour into a greased and floured cake pan, and bake at 400 degrees for 30 minutes (or until a toothpick comes out clean).
4. Allow to cool, frost with your favorite frosting and serve.
D. Actual Procedure and Observations:
This recipe was a fun one to make. It felt foreign to add the sourdough starter rather than adding baking soda or baking powder. The butter and cocoa were added together and mixed well to ensure that the cocoa was completely dissolved by the butter. It actually was very pretty and looked completely rich. All ingredients were added to the first mixture and placed in the pre-heated oven.
E. Discussion and Conclusion:
I was very skeptical that these brownies were going to turn out the way that I had hoped becuase of the taste of the sourdough. I thought it was a strange ingredient to add to a sweet and yummy brownie but I went ahead with it anyway. I did make one mistake thought that I will never make again. When I transferred the batter into the pan I tapped it against the counter very hard and several times. This I thought was the proper thing to do to spread out the batter and to "get the air bubble out"! Are you serious? As I was explaining to Jen the theory behind what I was doing (she looked at me like I was nuts!)
I realized how silly I sounded and how I was not at all demonstrating my knowledge that I had just gained by preparing for this recipe.
The recipe is void from baking powder or baking soda which we are so versed in using in our recipes. We used yeast in bread but never have we used a sourdough which contains the yeast, to be our sole leavening agent. The air bubbles that are trapped in the flour, water and yeast mixture are released as carbon dioxide and trapped in the gluten structure of the recipe. This we have already learned. I think the purpose of us doing this recipe now is so that we may demonstrate our knowledge of the various ways that we can have an end result of fluffy and air packed structure.
I loved these brownies. There was a perfect combination of sweet and savory and an amazing fun flavor of the sourdough. Once again....yum.
A. Chocolate Eclairs
B. Reagents:
basic pate choux dough:
1 cup water
1 stick butter
1 cup flour
pinch salt
6 eggs
C. Procedure:
1. In a large sauce pan, add water, salt, and butter. Bring to a boil and make sure butter has melted.
2. Add flour and mix together until a large ball forms.
3. Remove from heat, add one egg at a time, and incorporate completely. Continue adding
enough eggs to reach the desired consistency.
4. Pipe desired shape of éclairs onto a parchment-lined baking sheet.
5. Bake in a 425-degree oven until golden brown.
6. Remove and allow to cool. Fill with pastry cream and dip in melted chocolate.
D. Actual Procedure and Observations:
For me, this recipe was a piece of cake (no pun intended). I have made eclairs so many times before that today was no different. The butter and water were melted and the salt was added to heat. Once the flour was added and stirring began a ball formed looking similar to a runny pie dough. Once removed from heat the eggs were added one at a time. This was important to do as otherwise the eggs would take over the recipe and be a soupy mess. The batter was spooned onto a cookie sheet with parchment paper placed to prevent sticking and baked for about 35 mintues.
E. Discussion and Conclusion:
The key chemistry in this recipe is the addition of the flour to the butter/water/salt mixture and then the addition of the eggs. Eggs, eggs, eggs! They are so crucial to the foundation of baking and cooking. While the first few ingredients are important, the eggs are what provide the structure of the recipe. An eclair is meant to be fluffly and hollow in the middle and this can only be accomplished by the structure of the eggs. The purpose of adding the eggs one at a time is to keep them from over-taking the batter. They must be slowly incorporated to allow emulsification to occur. Eggs contribute three main ingredients: water, protein and fat. The eggs coagulate into a solid when heated which is what provides to the structure of the eclair. The egg yolk also contributes to the color and eggy flavor.
A. Pastry Cream
B. Reagents:
1/3 cup sugar
¼ cup cornstarch
1 tbsp vanilla
6 eggs light beaten
2 cups milk
C. Procedure:
1. In a large heat-proof bowl, add sugar and cornstarch and whisk together.
2. Add eggs and beat mixture together.
3. In a heavy-bottom sauce pan, add milk and vanilla, and bring to a boil.
4. Temper egg mixture and cook over low heat until mixture is thick; do not boil.
5. Strain pastry cream and cover with plastic wrap to prevent film from developing.
6. Pastry cream will set quite firm. To lighten pastry cream, simply fold some whipped
cream into the pastry cream.
D. Actual Procedure and Observations:
This was a fun recipe to do as it was slightly different than the puddings that we made before but much the same. Rather than adding the eggs one at a time, we were able to dump them all in at once. This made the recipe go by much faster. Once we added the heat the mixture slowly became thicker. We had to temper the eggs so that they did not scramble. No one wants chunky in their cream right? We cooked the mixture until it thickened but definitely before it began to boil and then removed it from the heat.
E. Discussion and Conclusion:
Once again the eggs are playing the major role in the recipe not only for their structure but also lending a huge hand in flavor. While they provide a great base to creating the thick cream, the cornstarch also has a bit of the control as a thickening agent. Corn starch becomes a very important ingredient when it is added to hot water. The energy of the molecules when heat is added is sufficient to disrupt the weaker, amorphous regions of the granule. This permits hydrogen bonding between starch and water molecules. The granules then absorb water and swell up, therby putting greater and greater stress on the crystalline regions creating a thickening property and a very yummy cream for the inside of the pastry. Top with melted chocolate and YUM.
The Many Wonders of Milk
A. Mozzarella Cheese
B. Reagents:
1 gallon whole milk
1 1/2 tsp citric acid
1/4 tsp liquid rennet
C. Procedure:
1. Dissolve the citric acid in 1/4 cup water; set aside.
2. Mix the rennet with 1/4 cup water; set aside.
3. Add the milk to a large heavy-bottomed pan (not aluminum or copper). Place on the
stove and stir in the citric acid solution. Begin to heat the milk to 90 degrees.
4. Remove from heat and add the rennet; gently stir for about 1 minute.
5. Allow the milk mixture to sit undisturbed for 40 minutes.
6. Once the curd has formed, cut the curd into inch squares, and begin to stir the curd while gradually heating the milk mixture to 105 degrees.
7. Remove from heat and continue stirring (GENTLY) for about 5 minutes.
8. Transfer curd to a metal colander, and allow the whey to drain. Gently press the curd to help the whey separate.
9. Heat curd in a microwave safe bowl for 30 seconds, and continue to drain off any excess whey.
10. Continue heating the curd until it reaches about 130 degrees. Remove the cheese and
knead like you would bread (add 1 tsp salt at this point) until the cheese becomes smooth and shiny. Be careful not to burn yourself while working the cheese, as the cheese will be warm.
D. Actual Procedure and Observations:
This was an incredibly fun and interesting experiment. I can't believe how much milk we used, once again, to get such a small return of cheese but boy was it worth it. So much fun. We followed the directions just as described although we became very confused when our curds and whey looked nothing like any others in the class. They were very small and fine. We continued on and only had to drain our product for a few minutes and microwave it once for 1 minute. It was waxy, shiny and oh so good.
E. Discussion and Conclusion:
The making of cheese is not only incredible science but it is also so much fun! The process is divided into three steps: 1. the precipitation of casein into curds. This is done by bacteria which produce the lactic acid. The bacteria are infused in warm milk to obtain a balanced acidity which is absolutely essential for the addition of the rennet and also pushes out less desire able organisms from the mixture. Since we do not have a method for adding bacteria in this class we added the citric acid to form the curds and allow for the acidity to be introduced into the milk. The acid ferments the lactose to lactic acid and reduce the milk's pH to the appropriate range for the rennet to coagulate the casein. Rennet is added because it causes the casein micelles to aggregate, trapping fat globules and whey in the protein network. 2. Any free whey is drained off and the curds are cut, pressed and cooked and salted to remove any more that may be lingering. 3. The final stage deals with "ripening" of the curds. This, although sounds strange, offers a very intense and characteristic flavor.
A. Buttermilk Experiment #1 (Cultured Buttermilk)
B. Reagents:
1/2 cup fresh buttermilk
1 1/2 cups fresh milk
C. Procedures:
1. Add the fresh buttermilk and milk to a quart jar.
2. Put the lid on the jar and shake to mix the ingredients together.
3. Unscrew the lid to loosen the seal.
4. Allow mixture to sit out in a warm part of your room for 24 hours. After 24 hours, the mixture should have thickened and then needs to be refrigerated as any milk product.
*If you find that the buttermilk takes longer than 36 hours to thicken, the starter was no longer active.
D. Actual Procedure and Observations:
We combined the buttermilk and the milk together in a bowl during class and then transferred the buttermilk to a plastic bag. Once I got home I transferred the buttermilk to the glass quart bottle and covered it with plastic wrap. In the morning it was then moved to the fridge. The smell was very strong and the texture very thick.
E. Discussion and Conclusion:
Buttermilk differs from cheese in that it is not treated with rennet. It is instead thickened or curdled with only the action of acid-producing bacteria. Buttermilk was originally the low-fat liquid that was left over from the process of making butter. It was then contaminated by bacteria that simply lived in the air that were introduced during the churning process. This caused the milk to thicken and sour. Buttermilk is a great addition to recipes for its rich, buttery flavor.
In this recipe the buttermilk is created by adding buttermilk to milk. This works because the acid that is required for the creation of buttermilk, is found in the buttermilk that is being added. That is the main requirement for buttermilk.
A. Buttermilk Experiment #2 (Quick Buttermilk)
B. Reagents:
1 cup milk
1 tbsp vinegar
C. Procedures:
Mix milk and vinegar together, and allow mixture to sit for 10 minutes.
D. Actual Procedure and Observations:
The milk was added to the vinegar and time was allowed to let the milk be curdled and the reaction occur by the acid.
E. Discussion and Conclusion:
Differing from the buttermilk recipe above, this recipe relies on the acid from the vinegar when added to the milk to provide the chemical reaction that was needed to create the needed final product. About five minutes after the addition of the vinegar, the curdles were seen. It was fun to see how quickly the reaction took place and that there was actually something happening. I do feel however that if I had to guess, the buttermilk that we made above and took home is far superior to this version.
A. Yogurt Experiment #1
B. Reagents:
2 cups milk
1-2 tsp plain yogurt
C. Procedures:
1. Create a double boiler by placing a large stainless-steel boiler over a pan of boiling water.
2. Pour the milk into the double boiler and heat until the milk reaches 185 degrees.
3. Remove milk from the pan and allow to cool to 110 degrees.
4. Add the yogurt to the milk.
5. Cover bowl with plastic wrap. Wrap the bowl with several layers of towels and allow to sit for about 7 hours undisturbed.
6. Mix the cultured yogurt together.
7. Pour the yogurt into a sealed container and refrigerate for 24 hours.
D. Actual Procedure and Observations:
I find it funny to believe that the yogurt that is made comes from yogurt itself. I made yogurt in high school and remember thinking how strange it was to make yogurt from yogurt and how the first yogurt was ever made if you had to always make it from it! The recipe was very easy to follow and occurred without any changes or alterations to the recipe.
E. Discussion and Conclusion:
Yogurt is made from milk and dried milk solids are sometimes used to add a more abundant source of casein for the final solid product. A mixed culture of Lactobacillus bulgaricus and Streptococcus thermophilus is added to the milk when the temperature comes down low enough which is approximately 45 degrees Celsius. The reason why this recipe was unsuccessful is due to the fact that we added our bacteria when the milk was too warm. We checked the temperature of our milk before it was added and it showed to be within the range but our yogurt never thickened which tells us it was too warm and our bacteria was killed in the process. So although we followed the directions just as we needed to, I do believe that there was an error with our temperature reading that prevented us from having the appropriate temperature to not kill the bacteria.
A. Yogurt and Curry Marinade
B. Reagents:
¼ cup yogurt
2 tsp curry
2 tbsp vegetable oil
salt and pepper to taste
C. Procedure:
1. Combine all ingredients in a bowl and whisk together.
2. Set aside until ready to use.
D. Actual Procedure and Observations:
We were not apart of this recipe but I am sure Brian performed it just as directed.
E. Discussion and Conclusion:
The recipe uses the same chemistry as the yogurt recipe above as yogurt is the main ingredient providing the very specific taste and texture that is offered by the product. The addition of the curry, salt and pepper allows for better flavor and the oil for a smoother texture.
A. Buttermilk Biscuits Experiment #1
(Using Cultured Buttermilk)
B. Reagents:
4 cups all-purpose flour
1 tbsp salt
1 tbsp baking powder
1 tsp baking soda
1 cup vegetable shortening, cold, cut into 1/2-inch pieces
1 1/2 to 2 cups buttermilk, plus additional for brushing
C. Procedure:
1. Preheat the oven to 375 degrees.
2. Whisk together the flour, salt, baking powder, and baking soda.
3. Cut in the shortening using a pastry blender or your hands until the mixture resembles coarse crumbs.
4. Make a well in the center and add 1 cup buttermilk. Using your hands, quickly fold the dry ingredients into the buttermilk until a sticky dough forms. You may need to add more buttermilk.
5. Turn the dough out onto a floured surface, and gently fold the dough over itself 3 or 4 times to create layers.
6. Press the dough out to 1 1/2-inches thick and cut with a floured 3-inch biscuit cutter.
7. Lay the biscuits on a prepared cookie sheet and brush the tops with buttermilk.
8. Bake for 20 to 25 minutes until risen and golden brown.
D. Actual Procedure and Observations:
Since we were only making one recipe today for the biscuits, we just had to choose what type of buttermilk we would be adding. That of the purchase buttermilk or the quick buttermilk that was made earlier. We decided to use the purchased buttermilk as it seems to be a bit richer and smoother and creamier than the buttermilk that was made with just the milk and vinegar. This was a fun recipe for me because I have never made them before. The idea of adding the shortening in pieces and then cutting it into the flour was new and fascinating. And it worked! I was so excited to see that there was science behind it. Once the shortening was added and worked into the dry ingredients, the wet ingredients were added in the center and mixed in. We were careful not to over mix and once all ingredients were combined, we were careful to fold the dough allowing layers to form but not to over mix. We rolled out the dough and kept it thick so we would have the extra height and super large rolls. I do think that if we could have changed something in the recipe we would have added less salt. The salt was almost overwhelming.
E. Discussion and Conclusion:
The shortening was important in this recipe but also the baking powder. These are two ingredients that we are now very familiar with. Baking powder is the leavening agent that allows for the dough to rise. The shortening is almost key here as it breaks up the masses of gluten, thus weakening the structure and making the final product more tender. This is especially important in bisquits. The model of fat breaking up gluten sheets describes this recipe perfectly. Large chunks of shortening are intentionally left unmixed with the flour. After repeated rollings and foldings, the dough becomes a mass of alternating gluten and fat layers. When baked, it results in a stack of sparated flakes rather and a more integrated and smooth network. It is also very important to cut the dough with a sharp cutter as a dull one will destroy the layers that were created by compression and prevent the dough from swelling in the oven.
When we compared our final product to others we realized that ours had a better flavor. It seemed a bit richer and smoother on the tongue. If I had to do this recipe again I would definitely use a store purchased milk that has had the sufficient time to produce the flavors that are so desired.
A. Buttermilk Biscuits Experiment #2
(Using Quick Buttermilk)
B. Reagents:
4 cups all-purpose flour
1 tbsp salt
1 tbsp baking powder
1 tsp baking soda
1 cup vegetable shortening, cold, cut into 1/2-inch pieces
1 1/2 to 2 cups buttermilk, plus additional for brushing
C. Procedure:
1. Preheat the oven to 375 degrees.
2. Whisk together the flour, salt, baking powder, and baking soda.
3. Cut in the shortening using a pastry blender or your hands until the mixture resembles coarse crumbs.
4. Make a well in the center and add 1 cup buttermilk. Using your hands, quickly fold the dry ingredients into the buttermilk until a sticky dough forms. You may need to add more buttermilk.
5. Turn the dough out onto a floured surface, and gently fold the dough over itself 3 or 4 times to create layers.
6. Press the dough out to 1 1/2-inches thick and cut with a floured 3-inch biscuit cutter.
7. Lay the biscuits on a prepared cookie sheet and brush the tops with buttermilk.
8. Bake for 20 to 25 minutes until risen and golden brown.
D. Actual Procedure and Observations:
We did not perform this experiment as there was not enough time but our neighbors did and they were good. They followed the same procedure as we did although with the substituted buttermilk.
E. Discussion and Conclusion:
As mentioned above, the final product of the first recipe with the processed buttermilk offerred a much richer flavor that this latter recipe. I think this is simply due to the fact that the first buttermilk has had more time to process and allow the bacteria to establish an exceptional taste.
B. Reagents:
1 gallon whole milk
1 1/2 tsp citric acid
1/4 tsp liquid rennet
C. Procedure:
1. Dissolve the citric acid in 1/4 cup water; set aside.
2. Mix the rennet with 1/4 cup water; set aside.
3. Add the milk to a large heavy-bottomed pan (not aluminum or copper). Place on the
stove and stir in the citric acid solution. Begin to heat the milk to 90 degrees.
4. Remove from heat and add the rennet; gently stir for about 1 minute.
5. Allow the milk mixture to sit undisturbed for 40 minutes.
6. Once the curd has formed, cut the curd into inch squares, and begin to stir the curd while gradually heating the milk mixture to 105 degrees.
7. Remove from heat and continue stirring (GENTLY) for about 5 minutes.
8. Transfer curd to a metal colander, and allow the whey to drain. Gently press the curd to help the whey separate.
9. Heat curd in a microwave safe bowl for 30 seconds, and continue to drain off any excess whey.
10. Continue heating the curd until it reaches about 130 degrees. Remove the cheese and
knead like you would bread (add 1 tsp salt at this point) until the cheese becomes smooth and shiny. Be careful not to burn yourself while working the cheese, as the cheese will be warm.
D. Actual Procedure and Observations:
This was an incredibly fun and interesting experiment. I can't believe how much milk we used, once again, to get such a small return of cheese but boy was it worth it. So much fun. We followed the directions just as described although we became very confused when our curds and whey looked nothing like any others in the class. They were very small and fine. We continued on and only had to drain our product for a few minutes and microwave it once for 1 minute. It was waxy, shiny and oh so good.
E. Discussion and Conclusion:
The making of cheese is not only incredible science but it is also so much fun! The process is divided into three steps: 1. the precipitation of casein into curds. This is done by bacteria which produce the lactic acid. The bacteria are infused in warm milk to obtain a balanced acidity which is absolutely essential for the addition of the rennet and also pushes out less desire able organisms from the mixture. Since we do not have a method for adding bacteria in this class we added the citric acid to form the curds and allow for the acidity to be introduced into the milk. The acid ferments the lactose to lactic acid and reduce the milk's pH to the appropriate range for the rennet to coagulate the casein. Rennet is added because it causes the casein micelles to aggregate, trapping fat globules and whey in the protein network. 2. Any free whey is drained off and the curds are cut, pressed and cooked and salted to remove any more that may be lingering. 3. The final stage deals with "ripening" of the curds. This, although sounds strange, offers a very intense and characteristic flavor.
A. Buttermilk Experiment #1 (Cultured Buttermilk)
B. Reagents:
1/2 cup fresh buttermilk
1 1/2 cups fresh milk
C. Procedures:
1. Add the fresh buttermilk and milk to a quart jar.
2. Put the lid on the jar and shake to mix the ingredients together.
3. Unscrew the lid to loosen the seal.
4. Allow mixture to sit out in a warm part of your room for 24 hours. After 24 hours, the mixture should have thickened and then needs to be refrigerated as any milk product.
*If you find that the buttermilk takes longer than 36 hours to thicken, the starter was no longer active.
D. Actual Procedure and Observations:
We combined the buttermilk and the milk together in a bowl during class and then transferred the buttermilk to a plastic bag. Once I got home I transferred the buttermilk to the glass quart bottle and covered it with plastic wrap. In the morning it was then moved to the fridge. The smell was very strong and the texture very thick.
E. Discussion and Conclusion:
Buttermilk differs from cheese in that it is not treated with rennet. It is instead thickened or curdled with only the action of acid-producing bacteria. Buttermilk was originally the low-fat liquid that was left over from the process of making butter. It was then contaminated by bacteria that simply lived in the air that were introduced during the churning process. This caused the milk to thicken and sour. Buttermilk is a great addition to recipes for its rich, buttery flavor.
In this recipe the buttermilk is created by adding buttermilk to milk. This works because the acid that is required for the creation of buttermilk, is found in the buttermilk that is being added. That is the main requirement for buttermilk.
A. Buttermilk Experiment #2 (Quick Buttermilk)
B. Reagents:
1 cup milk
1 tbsp vinegar
C. Procedures:
Mix milk and vinegar together, and allow mixture to sit for 10 minutes.
D. Actual Procedure and Observations:
The milk was added to the vinegar and time was allowed to let the milk be curdled and the reaction occur by the acid.
E. Discussion and Conclusion:
Differing from the buttermilk recipe above, this recipe relies on the acid from the vinegar when added to the milk to provide the chemical reaction that was needed to create the needed final product. About five minutes after the addition of the vinegar, the curdles were seen. It was fun to see how quickly the reaction took place and that there was actually something happening. I do feel however that if I had to guess, the buttermilk that we made above and took home is far superior to this version.
A. Yogurt Experiment #1
B. Reagents:
2 cups milk
1-2 tsp plain yogurt
C. Procedures:
1. Create a double boiler by placing a large stainless-steel boiler over a pan of boiling water.
2. Pour the milk into the double boiler and heat until the milk reaches 185 degrees.
3. Remove milk from the pan and allow to cool to 110 degrees.
4. Add the yogurt to the milk.
5. Cover bowl with plastic wrap. Wrap the bowl with several layers of towels and allow to sit for about 7 hours undisturbed.
6. Mix the cultured yogurt together.
7. Pour the yogurt into a sealed container and refrigerate for 24 hours.
D. Actual Procedure and Observations:
I find it funny to believe that the yogurt that is made comes from yogurt itself. I made yogurt in high school and remember thinking how strange it was to make yogurt from yogurt and how the first yogurt was ever made if you had to always make it from it! The recipe was very easy to follow and occurred without any changes or alterations to the recipe.
E. Discussion and Conclusion:
Yogurt is made from milk and dried milk solids are sometimes used to add a more abundant source of casein for the final solid product. A mixed culture of Lactobacillus bulgaricus and Streptococcus thermophilus is added to the milk when the temperature comes down low enough which is approximately 45 degrees Celsius. The reason why this recipe was unsuccessful is due to the fact that we added our bacteria when the milk was too warm. We checked the temperature of our milk before it was added and it showed to be within the range but our yogurt never thickened which tells us it was too warm and our bacteria was killed in the process. So although we followed the directions just as we needed to, I do believe that there was an error with our temperature reading that prevented us from having the appropriate temperature to not kill the bacteria.
A. Yogurt and Curry Marinade
B. Reagents:
¼ cup yogurt
2 tsp curry
2 tbsp vegetable oil
salt and pepper to taste
C. Procedure:
1. Combine all ingredients in a bowl and whisk together.
2. Set aside until ready to use.
D. Actual Procedure and Observations:
We were not apart of this recipe but I am sure Brian performed it just as directed.
E. Discussion and Conclusion:
The recipe uses the same chemistry as the yogurt recipe above as yogurt is the main ingredient providing the very specific taste and texture that is offered by the product. The addition of the curry, salt and pepper allows for better flavor and the oil for a smoother texture.
A. Buttermilk Biscuits Experiment #1
(Using Cultured Buttermilk)
B. Reagents:
4 cups all-purpose flour
1 tbsp salt
1 tbsp baking powder
1 tsp baking soda
1 cup vegetable shortening, cold, cut into 1/2-inch pieces
1 1/2 to 2 cups buttermilk, plus additional for brushing
C. Procedure:
1. Preheat the oven to 375 degrees.
2. Whisk together the flour, salt, baking powder, and baking soda.
3. Cut in the shortening using a pastry blender or your hands until the mixture resembles coarse crumbs.
4. Make a well in the center and add 1 cup buttermilk. Using your hands, quickly fold the dry ingredients into the buttermilk until a sticky dough forms. You may need to add more buttermilk.
5. Turn the dough out onto a floured surface, and gently fold the dough over itself 3 or 4 times to create layers.
6. Press the dough out to 1 1/2-inches thick and cut with a floured 3-inch biscuit cutter.
7. Lay the biscuits on a prepared cookie sheet and brush the tops with buttermilk.
8. Bake for 20 to 25 minutes until risen and golden brown.
D. Actual Procedure and Observations:
Since we were only making one recipe today for the biscuits, we just had to choose what type of buttermilk we would be adding. That of the purchase buttermilk or the quick buttermilk that was made earlier. We decided to use the purchased buttermilk as it seems to be a bit richer and smoother and creamier than the buttermilk that was made with just the milk and vinegar. This was a fun recipe for me because I have never made them before. The idea of adding the shortening in pieces and then cutting it into the flour was new and fascinating. And it worked! I was so excited to see that there was science behind it. Once the shortening was added and worked into the dry ingredients, the wet ingredients were added in the center and mixed in. We were careful not to over mix and once all ingredients were combined, we were careful to fold the dough allowing layers to form but not to over mix. We rolled out the dough and kept it thick so we would have the extra height and super large rolls. I do think that if we could have changed something in the recipe we would have added less salt. The salt was almost overwhelming.
E. Discussion and Conclusion:
The shortening was important in this recipe but also the baking powder. These are two ingredients that we are now very familiar with. Baking powder is the leavening agent that allows for the dough to rise. The shortening is almost key here as it breaks up the masses of gluten, thus weakening the structure and making the final product more tender. This is especially important in bisquits. The model of fat breaking up gluten sheets describes this recipe perfectly. Large chunks of shortening are intentionally left unmixed with the flour. After repeated rollings and foldings, the dough becomes a mass of alternating gluten and fat layers. When baked, it results in a stack of sparated flakes rather and a more integrated and smooth network. It is also very important to cut the dough with a sharp cutter as a dull one will destroy the layers that were created by compression and prevent the dough from swelling in the oven.
When we compared our final product to others we realized that ours had a better flavor. It seemed a bit richer and smoother on the tongue. If I had to do this recipe again I would definitely use a store purchased milk that has had the sufficient time to produce the flavors that are so desired.
A. Buttermilk Biscuits Experiment #2
(Using Quick Buttermilk)
B. Reagents:
4 cups all-purpose flour
1 tbsp salt
1 tbsp baking powder
1 tsp baking soda
1 cup vegetable shortening, cold, cut into 1/2-inch pieces
1 1/2 to 2 cups buttermilk, plus additional for brushing
C. Procedure:
1. Preheat the oven to 375 degrees.
2. Whisk together the flour, salt, baking powder, and baking soda.
3. Cut in the shortening using a pastry blender or your hands until the mixture resembles coarse crumbs.
4. Make a well in the center and add 1 cup buttermilk. Using your hands, quickly fold the dry ingredients into the buttermilk until a sticky dough forms. You may need to add more buttermilk.
5. Turn the dough out onto a floured surface, and gently fold the dough over itself 3 or 4 times to create layers.
6. Press the dough out to 1 1/2-inches thick and cut with a floured 3-inch biscuit cutter.
7. Lay the biscuits on a prepared cookie sheet and brush the tops with buttermilk.
8. Bake for 20 to 25 minutes until risen and golden brown.
D. Actual Procedure and Observations:
We did not perform this experiment as there was not enough time but our neighbors did and they were good. They followed the same procedure as we did although with the substituted buttermilk.
E. Discussion and Conclusion:
As mentioned above, the final product of the first recipe with the processed buttermilk offerred a much richer flavor that this latter recipe. I think this is simply due to the fact that the first buttermilk has had more time to process and allow the bacteria to establish an exceptional taste.
Subscribe to:
Posts (Atom)